The process, where do you start?
'What have I done!'
After the total strip down I discovered that my £300 bike was probably going to turn into a money sucking vampire tool from hell, and I was right, what was knackered was recycled and what was good was decanted into crates, loads of 'em.
The frame was sent off to be blasted along with the engine, I just blocked all the holes up that could suck grit in and let the sandblaster do it's dirty work.
Everything else was restored by hand, piece by piece, I reckon you could show me a tiny fragment of any component on that bike and I could tell you what it was and where it went! For me the best investment was a wagon load of rotary wire brushes for the drill, I would spend hours in the shed hitting the wire wheels with every part including every spoke and then weeks picking the steel brush wires out of my clothing, they are very effective, I reckon I could clean anything on my Bosch drill set-up (the drill was clamped in the vice)
It's a frame up...
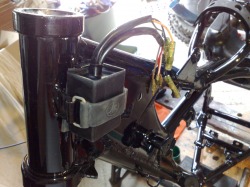
Here is the frame, cable tied to a Black & Decker Workmate, back from Scotty's paintshop, sprayed in 2 pack gloss black and baked in an oven, you can see the CDi unit with it's new connectors on and ready, the rubber strap was eventually re-plated with zinc along with a few other parts. CDi mounts high on the frame to keep it away from the wet stuff, mounts on a rubber cushion. Footpegs were replaced with fat one's from a nice man in China, original bars were repainted.
Click here for more frame images.
Click here for more frame images.
Breath of Fresh Air
The airbox was taken apart and refurbished, I replaced the original rivets with screws and nyloc nuts, the manifold ring was re-plated in zinc. This particular model uses a "wet" filter, yamaha recommend using filter oil and wringing out the excess, I use the premix from the tank plus a few cc's of oil extra. Whatever suits you or your smartarse know-it-all mate.
Click here for more airbox images.
Click here for more airbox images.
The Motion Lotion
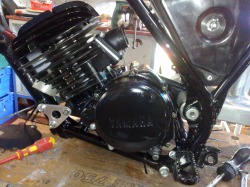
The engine was turning over when I picked up the bike, a total strip down followed, close inspection revealed a few chewed up gears and a wrecked clutch arm bearing, main bearings and seals were shot, these were all replaced in the rebuild. A brand new barrel was found on Ebay along with a new exhaust pipe, great find. The engine has the swinging arm shaft running through it.
Click here for more engine images.
Click here for more engine images.
Carb
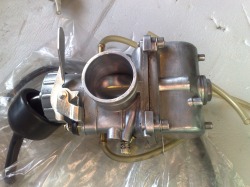
Mikuni carb was stripped down and cleaned piece by piece, the carb body was cleaned up using a Dremel with a very small wire brush attachment. Choke lever was replated in zinc. Found a NOS slide on Ebay, carb boot was replaced, new throttle cable and Gunnar Gasser throttle body fitted. Float height was set according to the manual. Boyesen reeds were in the donor bike.
Click here for more Mikuni carburetor images
Click here for more Mikuni carburetor images
Shocking...

Stripped the shock down using a set of spring clamps from Ebay, the half moon clips in the picture drop out once the spring is compressed and the shock comes apart, a few parts from the shock went to the platers for the zinc treatment, the rest was cleaned up, the spring clamps were reused to put it all back together. Click here for more shocking images
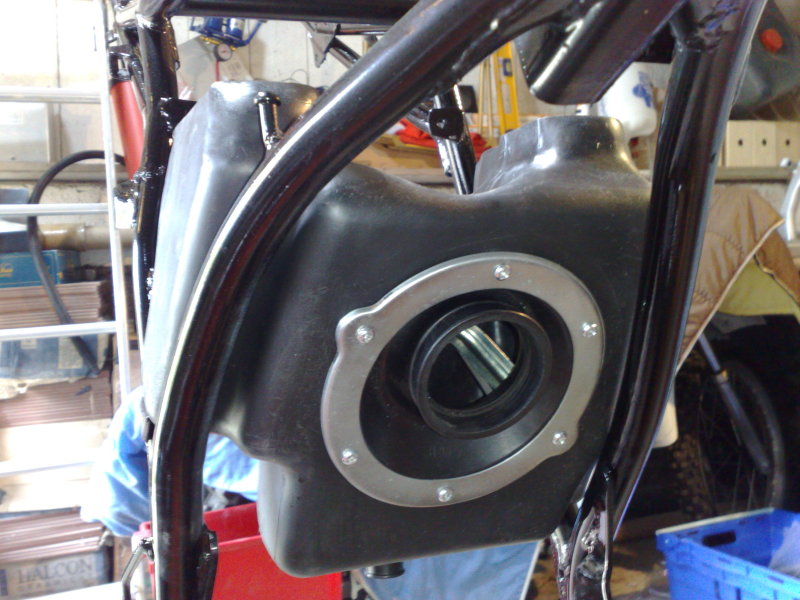
Swinging Arm Yamaha Monocross System
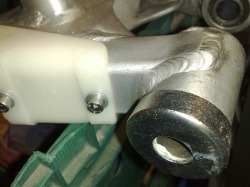
Yamaha was one of the first manufacturers to fit as standard the monoshock or single shock system to it's products, the early set-ups used a black tubular steel frame, the Yamaha range of 1980 was the first to use an aluminium box section and a shock with a seperate reservoir. The finish on the arm was a brushed effect although a lot of bikes have them highly polished. The arm pivoted on the bottom mount using needle roller bearings and bushes and a shaft that also acted as the rear engine mount, on the top of the arm a simple clevis pin and bush system.
Click here for more Monocross images
Click here for more Monocross images
Forking heck
The forks were in pretty good shape, the seals were gone and what drained out was just an oily sludge, the stanchions were straight and the chrome was in very good nick, the gaitors from the donor bike were the original items and also cleaned up well. I used a golf club to remove the fork inner tubes!
Click here for more forking images.
Click here for more forking images.
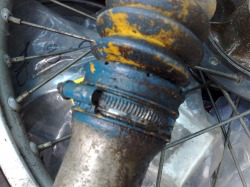
Wheels and stopppers
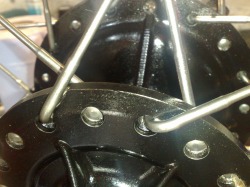
Do not attempt this at home, I reckon I spent a week on those wheels, Yamaha's Z spoke set up with three or four different length spokes, inside and outside, different cranks, an absolute nightmare, next time I will send them to a wheelbuilder.
I stripped out every spoke and cleaned and polished every one, I managed to get some new nipples from a guy I know which made the process a lot easier.
I have to admit it was very satisfying when you tighten the spokes and the rim just rises up to it's central position.
The brakes are the standard set-up, new shoes, a coat of paint and some grease. Done.
Click here for more wheel and brake images
Bodywork
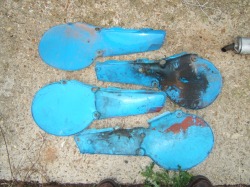
As you have seen from the original pictures the plastics were in very poor shape, the tank was a real chore, starting with paint stripper and then varying grades of sandpaper, polishing compounds and then clear silicone car polish. It's not brilliant but it is a whole lot better! NOS (new Old Stock) side panels were just too expensive, I sold the originals on Ebay to fund the YZ125G replacements which came from Portland Oregon, the originals were lost in the post by Royal Mail (Royal Fail) Seat was recovered, oh, I forgot to mention, I had to buy another complete bike just for the seat pan. A YZ cover was used from an Ebay seller in Canada, a good fit, the logo on the side is not standard. Front mudguard was new from Fowlers of Bristol UK and the rear is a DC Plastics model, the headlight came from the donor bike and has been left as I found it, with peeling paint and scratches, looks good with age.
Click here for more bodywork images
Click here for more bodywork images
Stickers, decals, whatever!
I decided against tank stickers for now, it says Yamaha on the seat, I bought a set from Nick at www.motoduro.co.uk they were perforated to allow the tank to breathe. My local signmaker sold me a sheet of yellow and some clear vinyl for £5 I made the sidepanel stickers on my PC and then laid a clear vinyl over the top, cost nearly £zero !
Click here or on the picture for a gallery of decals from various IT's.
Click here or on the picture for a gallery of decals from various IT's.
No More Dings..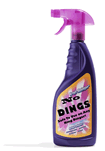
I tried No More Dings, it doesn't work, I had to use a tub of good old fashioned elbow grease.
|
What Ships In The Box? Enlarge
Original packing instructions from Yamaha. Click on the image for the bigger picture.
|
|
|
|
